10 DIY Wall Decor Ideas to Transform Your Space
Transforming your living space with unique and personalized wall decor can significantly enhance the aesthetic appeal of your home. DIY projects not only allow you to express your creativity but also offer a cost-effective way to refresh your environment. This blog post will guide you through 10 DIY wall decor ideas that are both simple and stunning. Whether you’re a seasoned crafter or a beginner, these projects will inspire you to create beautiful and meaningful pieces for your walls.
1. Framed Botanical Prints
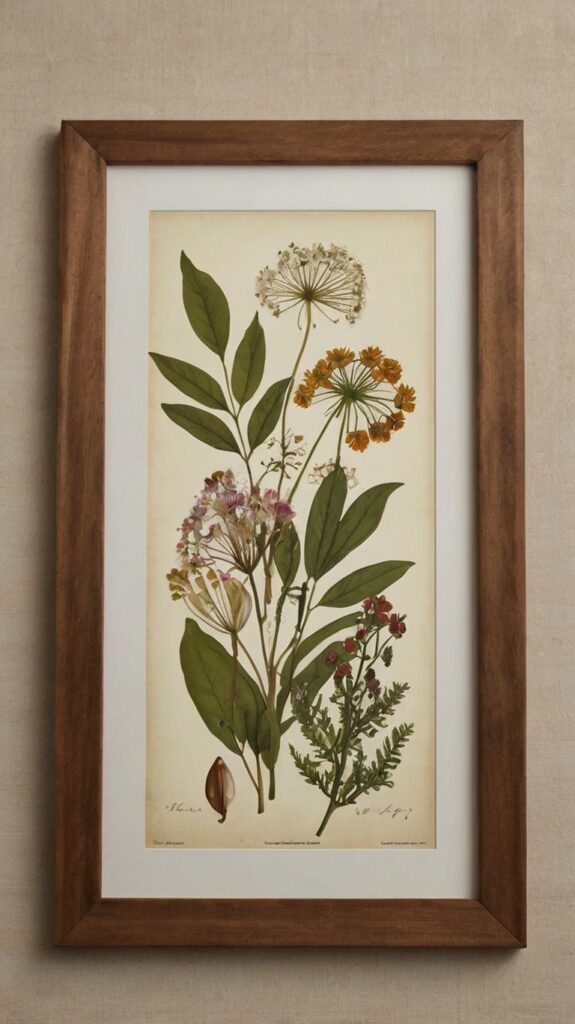
Materials Needed
- Botanical prints or pressed flowers
- Picture frames
- Clear adhesive spray
- Scissors
- Cardstock or mounting board
Step-by-Step Guide
- Select Your Prints: Choose botanical prints or pressed flowers that match your room’s color scheme. You can find these at craft stores or online.
- Prepare the Frame: Remove the glass and backing from your picture frame. Cut a piece of cardstock or mounting board to fit the frame.
- Arrange the Prints: Lay the prints on the cardstock and arrange them to your liking. You can overlap them for a layered look or place them side by side.
- Secure the Prints: Spray the back of the prints with clear adhesive and press them onto the cardstock. Trim any excess paper with scissors.
- Insert into Frame: Place the cardstock with the prints into the frame, add the glass, and secure the backing.
Tips
- Use a variety of sizes and shapes for a more dynamic display.
- Consider using a mix of black and white and colored prints for contrast.
Also Read: 10 Mirror Wall Decor Ideas to Transform Your Space
2. Geometric Wall Hanging
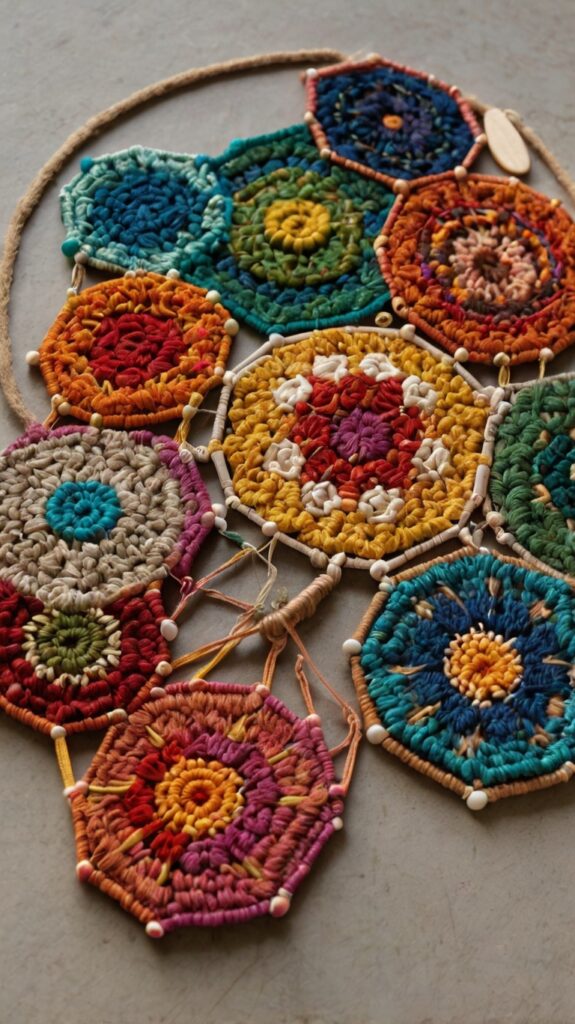
Materials Needed
- Wooden dowels
- Yarn or string
- Beads
- Scissors
- Glue
Step-by-Step Guide
- Create the Base: Cut a wooden dowel to the desired length. This will serve as the top bar of your wall hanging.
- Cut the Yarn: Cut several pieces of yarn or string to the same length, about twice the length you want your wall hanging to be.
- Attach the Yarn: Fold each piece of yarn in half and loop it over the dowel. Pull the loose ends through the loop and tighten to secure.
- Add Beads: Thread beads onto the yarn to create patterns or designs. You can use different colors and sizes for variety.
- Trim the Ends: Once you’ve added all the beads, trim the ends of the yarn to create a neat, even look.
Tips
- Experiment with different yarn textures and colors to create a unique look.
- Consider adding a few tassels at the bottom for an extra touch of elegance.
3. Vintage Map Collage

Materials Needed
- Vintage maps or travel posters
- Picture frames
- Mod Podge
- Paintbrush
- Scissors
- Cardstock or mounting board
Step-by-Step Guide
- Select Your Maps: Choose vintage maps or travel posters that resonate with your personal style. You can find these at thrift stores or online.
- Cut the Maps: Cut the maps into smaller pieces or shapes. You can create a collage with various sizes and shapes or use uniform pieces for a more structured look.
- Prepare the Frame: Remove the glass and backing from your picture frame. Cut a piece of cardstock or mounting board to fit the frame.
- Apply Mod Podge: Brush a thin layer of Mod Podge onto the cardstock. Place the map pieces on the cardstock, overlapping them as desired.
- Seal the Collage: Once all the pieces are in place, brush another layer of Mod Podge over the top to seal the collage.
- Insert into Frame: Place the cardstock with the collage into the frame, add the glass, and secure the backing.
Tips
- Use a mix of maps from different locations to create a travel-themed collage.
- Add a few decorative elements like stickers or paint to enhance the design.
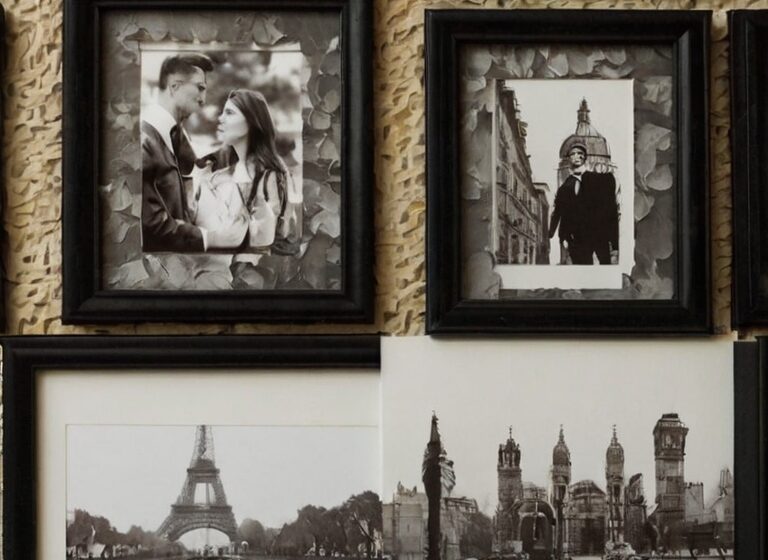
4. Photo Collage
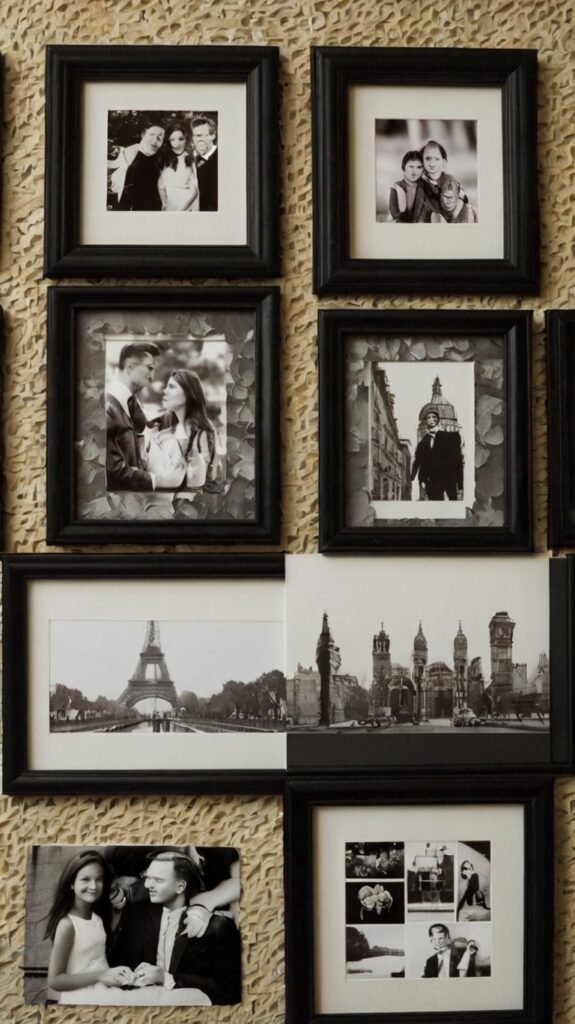
Materials Needed
- Family photos or personal photos
- Picture frames
- Mod Podge
- Paintbrush
- Scissors
- Cardstock or mounting board
Step-by-Step Guide
- Select Your Photos: Choose photos that hold special meaning to you. You can use family photos, travel photos, or any other images that you love.
- Print the Photos: Print the photos in the desired size. You can print them at home or have them professionally printed.
- Cut the Photos: Cut the photos into smaller pieces or shapes. You can create a collage with various sizes and shapes or use uniform pieces for a more structured look.
- Prepare the Frame: Remove the glass and backing from your picture frame. Cut a piece of cardstock or mounting board to fit the frame.
- Apply Mod Podge: Brush a thin layer of Mod Podge onto the cardstock. Place the photo pieces on the cardstock, overlapping them as desired.
- Seal the Collage: Once all the pieces are in place, brush another layer of Mod Podge over the top to seal the collage.
- Insert into Frame: Place the cardstock with the collage into the frame, add the glass, and secure the backing.
Tips
- Use a mix of black and white and colored photos for contrast.
- Add a few decorative elements like stickers or paint to enhance the design.
Also Read:10 Apartment Balcony Decorating Ideas to Transform Your Small Space
5. String Art
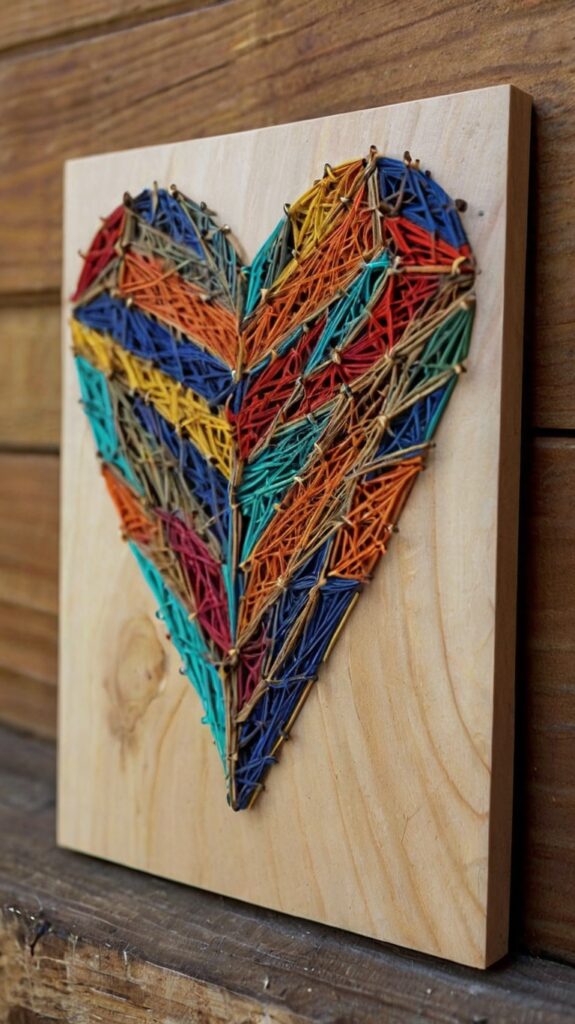
Materials Needed
- Wooden board
- Nails or push pins
- Hammer
- Embroidery floss or string
- Pencil
- Ruler
Step-by-Step Guide
- Choose a Design: Decide on the design you want to create. Common designs include geometric shapes, letters, or silhouettes.
- Mark the Board: Use a pencil and ruler to mark the points where you will hammer the nails. Space the points evenly for a clean look.
- Hammer the Nails: Hammer the nails into the marked points. Make sure they are secure but not too deep.
- Thread the String: Tie one end of the string to a nail and begin threading it around the other nails to create your design. You can use a single color or multiple colors for variety.
- Secure the String: Once you’ve completed the design, tie the string to the last nail and trim any excess.
Tips
- Practice the design on paper first to ensure you like the layout.
- Use a mix of thick and thin strings for texture.
6. Macrame Wall Hanging
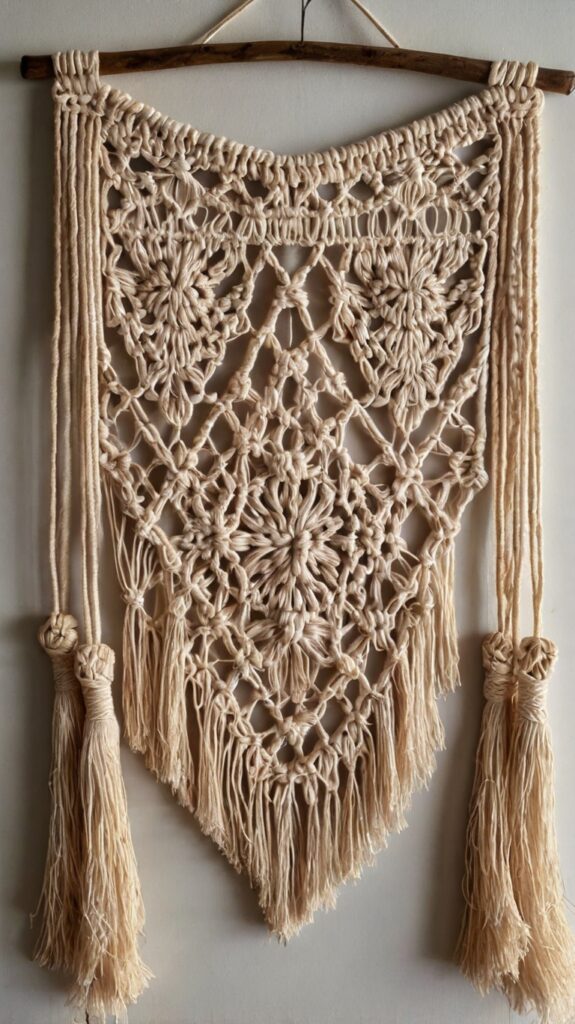
Materials Needed
- Macrame cord
- Wooden dowel
- Scissors
- Measuring tape
Step-by-Step Guide
- Cut the Cord: Cut several pieces of macrame cord to the desired length. The length will depend on how long you want your wall hanging to be.
- Attach the Cord: Fold each piece of cord in half and loop it over the dowel. Pull the loose ends through the loop and tighten to secure.
- Create the Knots: Use various macrame knots to create your design. Common knots include the square knot, spiral knot, and diagonal half hitch.
- Add Tassels: Once you’ve completed the knotting, add a few tassels at the bottom for an extra touch of elegance.
- Trim the Ends: Trim the ends of the cord to create a neat, even look.
Tips
- Practice the knots on a smaller piece of cord first to get the hang of them.
- Use a mix of cord colors for a vibrant look.
7. Wall-Mounted Bookshelf
Materials Needed
- Wooden boards
- Saw
- Sandpaper
- Paint or stain
- Drill
- Screws
- Wall anchors
Step-by-Step Guide
- Cut the Boards: Cut the wooden boards to the desired length and width. You can use a saw or have the boards cut at a hardware store.
- Sand the Boards: Sand the boards to smooth out any rough edges or splinters.
- Paint or Stain: Paint or stain the boards to match your room’s decor. Allow them to dry completely.
- Drill Holes: Drill holes in the boards where you will attach the screws. Use wall anchors for added security.
- Mount the Shelves: Attach the boards to the wall using screws and wall anchors. Make sure they are level and secure.
Tips
- Use a level to ensure the shelves are even.
- Consider adding a few decorative elements like plants or small vases to the shelves.
8. Floating Shelves with Hidden LED Lights
Materials Needed
- Wooden boards
- Saw
- Sandpaper
- Paint or stain
- Drill
- Screws
- Wall anchors
- LED strip lights
- Power adapter
Step-by-Step Guide
- Cut the Boards: Cut the wooden boards to the desired length and width. You can use a saw or have the boards cut at a hardware store.
- Sand the Boards: Sand the boards to smooth out any rough edges or splinters.
- Paint or Stain: Paint or stain the boards to match your room’s decor. Allow them to dry completely.
- Drill Holes: Drill holes in the boards where you will attach the screws. Use wall anchors for added security.
- Mount the Shelves: Attach the boards to the wall using screws and wall anchors. Make sure they are level and secure.
- Install LED Lights: Attach the LED strip lights to the underside of the shelves. Connect the power adapter to the lights and plug it in.
Tips
- Use a level to ensure the shelves are even.
- Consider using a dimmer switch to control the brightness of the lights.
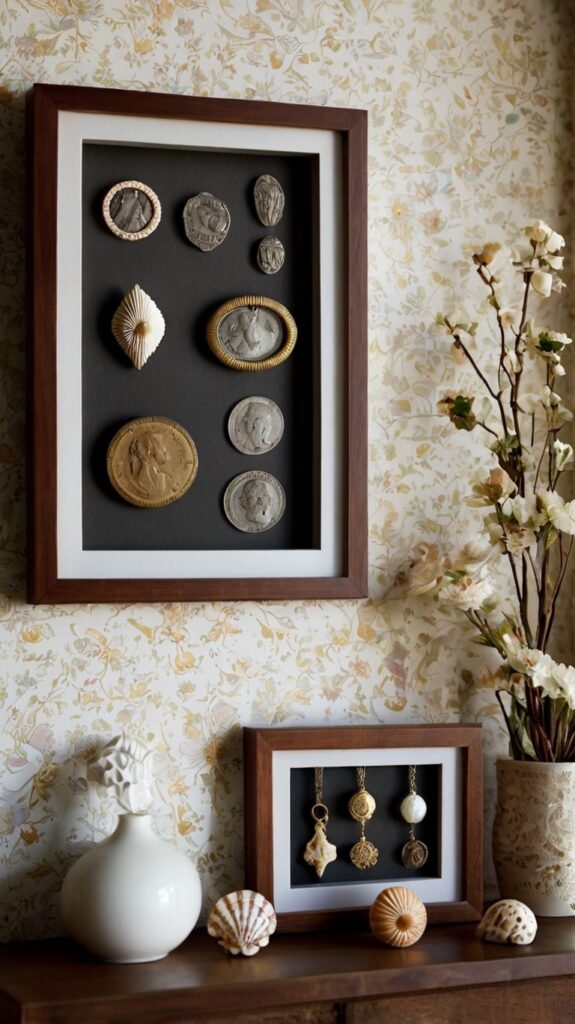
9. Shadow Box Art
Materials Needed
- Shadow box frames
- Decorative items (e.g., seashells, feathers, small figurines)
- Glue
- Scissors
- Paint (optional)
Step-by-Step Guide
- Select Your Items: Choose decorative items that you want to display in the shadow box. These can include seashells, feathers, small figurines, or any other items that hold personal meaning.
- Prepare the Frame: Remove the backing from the shadow box frame. If desired, paint the inside of the frame to match your room’s decor.
- Arrange the Items: Place the decorative items inside the frame and arrange them to your liking. You can create a theme or a random arrangement.
- Secure the Items: Use glue to secure the items in place. Make sure they are firmly attached.
- Insert the Backing: Once the glue has dried, insert the backing and secure it in place.
Tips
- Use a mix of textures and colors to create a dynamic display.
- Consider adding a few small lights inside the shadow box for an extra touch of ambiance.
Also Read: 10 Apartment Decorating Ideas for Men: Creating a Stylish and
10. Recycled Art
Materials Needed
- Recycled materials (e.g., bottle caps, old keys, broken jewelry)
- Wooden board or canvas
- Glue
- Paint (optional)
Step-by-Step Guide
- Collect Your Materials: Gather recycled materials that you want to use in your art. These can include bottle caps, old keys, broken jewelry, or any other items that you find interesting.
- Prepare the Base: Choose a wooden board or canvas as the base for your art. If desired, paint the base to match your room’s decor.
- Arrange the Materials: Place the recycled materials on the base and arrange them to your liking. You can create a theme or a random arrangement.
- Secure the Materials: Use glue to secure the materials in place. Make sure they are firmly attached.
- Add Finishing Touches: Once the glue has dried, add any finishing touches like paint or varnish to enhance the design.
Tips
- Use a mix of materials to create a unique and eclectic look.
- Consider adding a few personal touches like photos or notes to make the art more meaningful.
Conclusion
DIY wall decor is a fantastic way to add a personal touch to your home and create a space that reflects your unique style. Whether you choose to create a framed botanical print, a geometric wall hanging, or a shadow box art piece, the possibilities are endless. By following these 10 DIY wall decor ideas, you can transform your living space into a beautiful and inviting environment that you can be proud of. So, gather your materials, put on your creative hat, and start crafting your way to a more beautiful home.